K162

Starwalker, Stardust.

0%

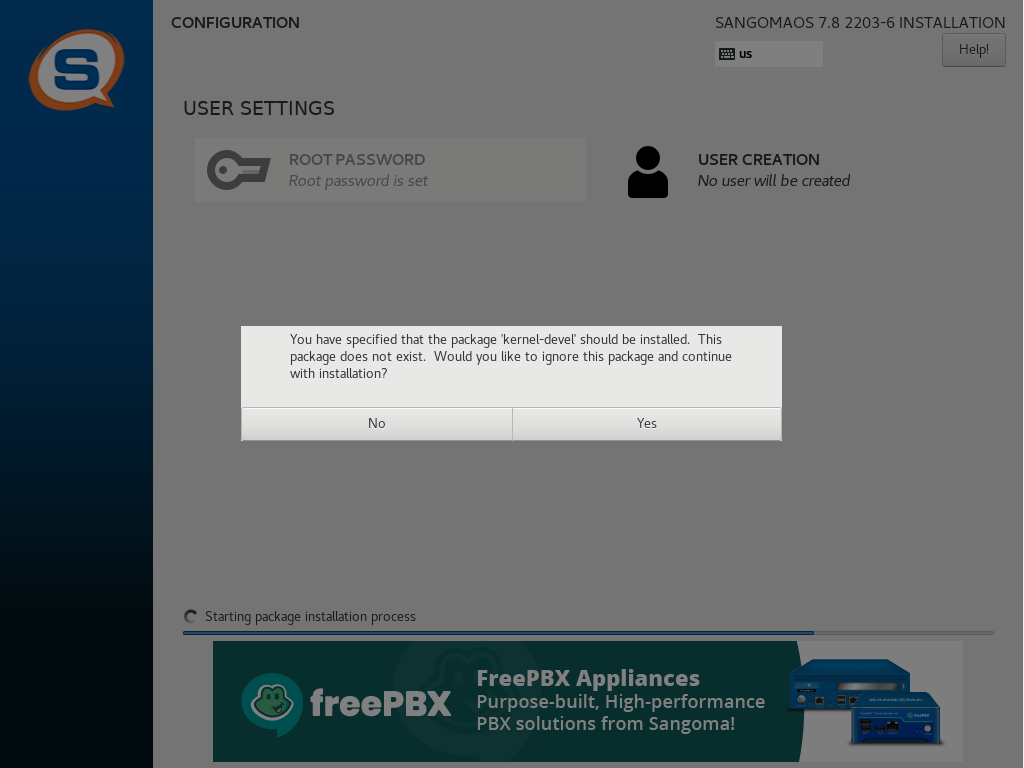
Recently I have been developing a low-code application with Microsoft Platform, chosen SharePoint List as my data support. However, when I share the App to other users, the App will raise a pop-up window requesting the permission for accessing SharePoint List.

Install PowerShell Module

Open PowerShell with administrator right and execute the command below to install module required:

1
Install-Module -Name Microsoft.PowerApps.Administration.PowerShell

Acquire the Environment ID and App ID

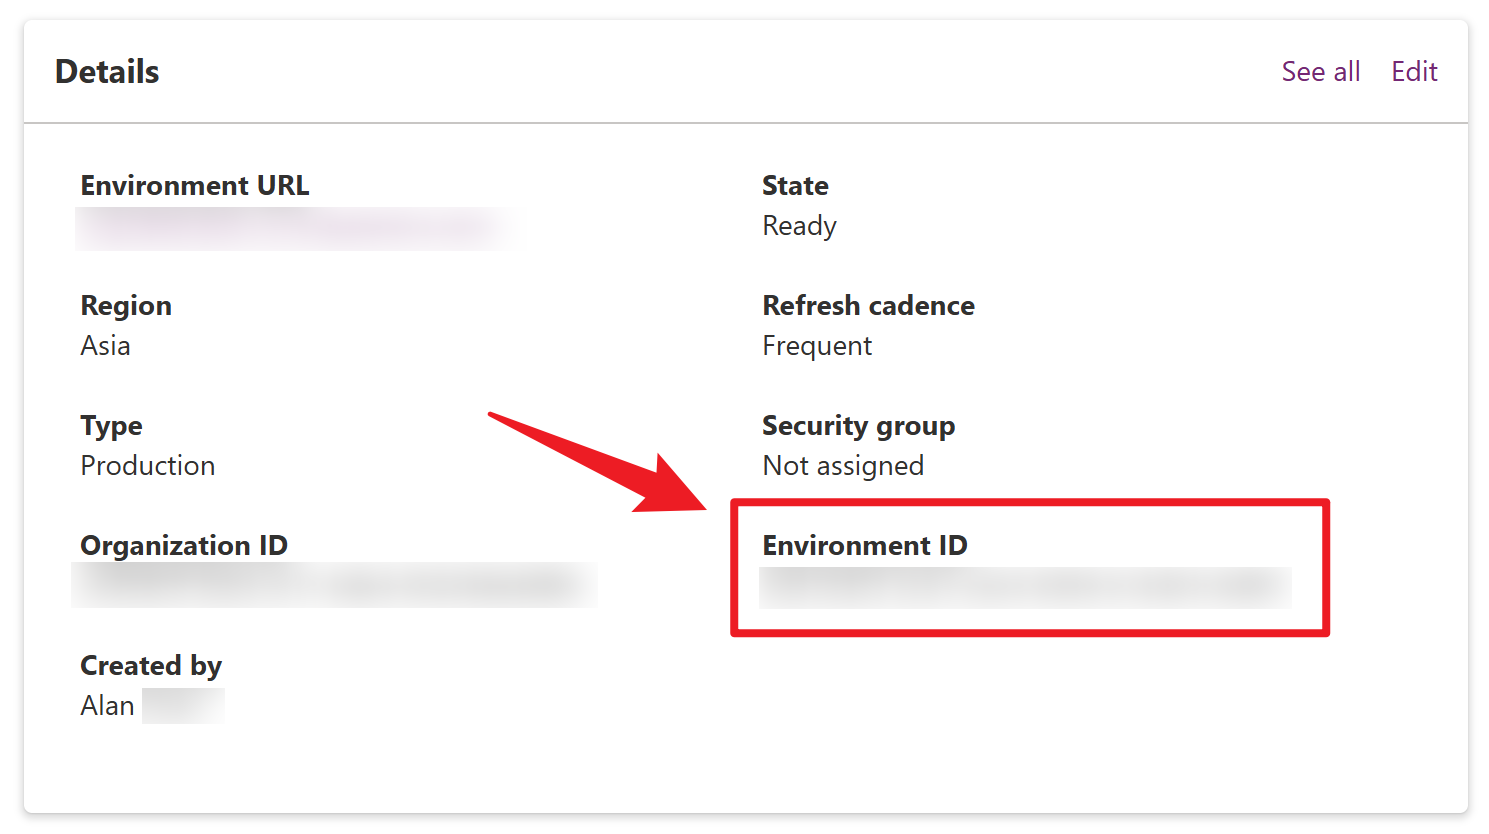
Login Power Platform admin center with your organization’s account, and find the Environment ID of the app deployed. Then, find the App ID from the detail view of the app.

kernel-devel error

Finally, run the command below to set bypass the consent:

1
Set-AdminPowerAppApisToBypassConsent -EnvironmentName 00aa00aa-bb11-cc22-dd33-44ee44ee44ee -AppName 00001111-aaaa-2222-bbbb-3333cccc4444

Now user will not receive the pop-up window requesting for data connection approval.

References

Programmability and Extensibility - PowerShell - Installation - Power Platform | Microsoft Learn

Set-AdminPowerAppApisToBypassConsent (Microsoft.PowerApps.Administration.PowerShell) | Microsoft Learn

Recently, I try to manage the documents, papers and references with Zotero. To keep my libraries updated between my devices and multi platforms, I decide to set up my Raspberry Pi (using Raspberry Pi OS) as an WebDAV server.

If you are in a Linux environment such as Ubuntu, the steps for configuration are similar.

Step 1: Install Apache2 and enable WebDAV module

Firstly, we need to install Apache Web server to enable WebDAV file sharing:

1
sudo apt install apache2

And enable WebDAV module with the directive following:

1
2
sudo a2enmod dav
sudo a2enmod dav_fs

Step 2: Create the directory for WebDAV

We will organize the documents files within the folder we created:

1
sudo mkdir /var/www/webdav

Remember to set the owner and group of the directory to apache’s user and group, granting permission to www-data:

1
sudo chown www-data:www-data /var/www/webdav

Step 3: Configure Apache Host

Add the following directives inside the <VirtualHost> tags in the file /etc/apache2/sites-available/000-default.conf:

1
2
3
4
5
6
7
8
Alias /webdav /var/www/webdav
<Location /webdav>
DAV On
AuthType Basic
AuthName "WebDAV"
AuthUserFile /etc/apache2/webdav.users
Require valid-user
</Location>

Step 4: Create user for WebDAV

Use the htpasswd utility to create a user for WebDAV accessing:

1
sudo htpasswd -c /etc/apache2/webdav.users your_username

Step 5: Restart Apache

Restart apache2 to apply the change:

1
sudo systemctl restart apache2

If you encounter some error message like below when restarting apache.service:

1
Address already in use: AH00072: make_sock: could not bind to address...

Please check the processes or services listening on the port that Apache is configured to use.

We can open Web browser and type http:/server_ip_or_domain/webdav to check the connection and WebDAV availability. Enter the user and password in the pop-up window, then you will access the directory we created.

Finally, Zotero could synchronize the documents with the local server at a fast speed. (树莓派吃灰属性 -1 😆)

When I install FreePBX in Vmare Workstation Player with the ISO image STABLE SNG7-PBX-64bit-2203-2 downloaded from FreePBX Official website, it raised an error message like screenshot below.

kernel-devel error

You have specified that the package ‘kernel-devel’ should be installed. This package does not exist. Would you like to ignore this package and continue with installation?

Regardless of whether Yes or No is clicked, the installer will be terminated, entering a black screen with a blinking cursor.

Solution

FreePBX ISO should not be setup with Easy Install in Vmware Workstation Player. So please select the option I will install the operating system later in the wizard.

Do Not Select Easy Install

Vmware will detect CentOS 7 in the image. After that, you should be able to install FreePBX properly.

我习惯在 Terminal 中直接使用某软件的 core,接着手动在 系统偏好设置->网络->高级->代理 打开/关闭代理配置。但苦于要一次次在系统偏好设置中来回切换,实在觉得麻烦。

最近发现,Apple 在 Remote Desktop 支持上,提供了一个命令 networksetup,用来快速配置客户端的网络设置。1

例如,可以使用它快速获取当前硬件端口上所有的网络服务:

1
2
3
4
$ networksetup -listallnetworkservices
USB 10/100/1000 LAN
Wi-Fi
Thunderbolt Bridge

或是借助下面的命令,快速配置设备的网络代理。更多用法可以通过 networksetup -help 查看。

1
2
3
4
5
6
7
8
9
10
11
12
13
14
# Web Proxy (HTTP)
networksetup -getwebproxy <networkservice>
networksetup -setwebproxy <networkservice> <domain> <port number> <authenticated> <username> <password>
networksetup -setwebproxystate <networkservice> <on off>

# Secure Web Proxy (HTTPS)
networksetup -getsecurewebproxy <networkservice>
networksetup -setsecurewebproxy <networkservice> <domain> <port number> <authenticated> <username> <password>
networksetup -setsecurewebproxystate <networkservice> <on off>

# SOCKS Proxy
networksetup -getsocksfirewallproxy <networkservice>
networksetup -setsocksfirewallproxy <networkservice> <domain> <port number> <authenticated> <username> <password>
networksetup -setsocksfirewallproxystate <networkservice> <on off>

开心!那我岂不是可以在 捷径(Shortcuts) 中创建一个 shortcut,然后丢 menu bar,就能一键切换代理啦!

shortcut detail shortcut on menu bar

本来还尝试过,想让 Shortcut 打开 Terminal 直接执行命令,或通过捷径让 Terminal 去打开一个 .command 文件,但可惜,都不允许呢~可不管怎样,有这个命令后,真的比以前方便很多了!

参考链接

[1] About networksetup in Remote Desktop

更改 Active Directory 域控制器的计算机名称,一般不应该从 Windows 的设置应用中,直接使用”重命名这台电脑“按钮进行修改。也不应该从”系统属性“面板中,点击”更改“按钮来重命名计算机。因为这可能会造成各种问题,例如造成计算机属性和 AD 数据库中的信息不一致,导致在下次登录服务器时:

The SAM database on the windows server does not have a computer account for this workstation trust relationship.

服务器上的安全数据库没有此工作站信任关系的计算机帐户。

使用 Netdom 修改域控制器计算机名称

所以,建议使用 Netdom 来重命名域控制器的计算机名称。

这里假设我的域控制器计算机名称为 WIN-BLAHBLAH,想修改为 ADS01,域名为 mikumoe.com

操作步骤

0x01 运行 Powershell

以管理员身份运行 Powershell。

在 Powershell 中,你可以通过 /ENUMerate 来获取当前服务器或计算机可用的 FQDN,例如:

1
2
3
4
5
PS C:\Windows\system32> netdom computername WIN-BLAHBLAH.mikumoe.com /enumerate
计算机的所有名称是:

WIN-BLAHBLAH.mikumoe.com
命令成功完成。

在这里,我们只有一条记录。

0x02 新建新计算机名 FQDN

在域控制器上,新建一条新计算机名的 FQDN(Fully Qualified Domain Name)记录。这会在 Active Directory 数据库中新增一条 SPN 记录的同时,也会在 DNS 服务器中新增一条 SRV 记录:

1
netdom computername <当前计算机名称> /add:<新的计算机名称>

例如:

1
2
3
4
5
PS C:\Windows\system32> netdom computername WIN-BLAHBLAH.mikumoe.com /add:ADS01.mikumoe.com
已成功将 ADS01.mikumoe.com
添加为计算机的替换名称。

命令成功完成。

此时,再次通过 /ENUmerate 查看计算机可用的 FQDN,就会发现有了 2 条记录:

1
2
3
4
5
6
PS C:\Windows\system32> netdom computername WIN-BLAHBLAH.mikumoe.com /ENUMerate
计算机的所有名称是:

WIN-BLAHBLAH.mikumoe.com
ADS01.mikumoe.com
命令成功完成。

0x03 设置主名称

使用 /MakePrimary 把新的计算机名称,设置为主名称:

1
netdom computername <当前计算机名称> /makeprimary:<新的计算机名称>

例如:

1
2
3
4
5
6
7
8
9
10
PS C:\Windows\system32> netdom computername WIN-BLAHBLAH.mikumoe.com /makeprimary:ADS01.mikumoe.com
已成功将 ADS01.mikumoe.com 设为计算机的主名称。
必须重新启动计算机才能使此名称更改生效。
在此之前,此计算机可能无法验证
用户和其他计算机,并且无法被林中的其他计算机验证。
指定的新名称已从计算机替换名称列表中删除。
在重新启动后,
主计算机名将被设置为指定的新名称。

命令成功完成。

随后,根据提示,需要重启服务器

0x04 移除旧的计算机名 FQDN

重启完毕后,使用以管理员身份运行 Powershell,移除旧的域控制器计算机名称:

1
netdom computername <新的计算机名称> /remove:<当前计算机名称>

例如:

1
2
3
4
5
PS C:\Windows\system32> netdom computername ADS01.mikumoe.com /remove:WIN-BLAHBLAH.mikumoe.com
已作为计算机的
替换名称成功删除 WIN-BLAHBLAH.mikumoe.com。

命令成功完成。

再次查看计算机可用的 FQDN,此时就只有一条记录了:

1
2
3
4
5
PS C:\Windows\system32> netdom computername ADS01.mikumoe.com /ENUMerate
计算机的所有名称是:

ADS01.mikumoe.com
命令成功完成。

0x05 检查一下

此时,在服务器管理器的面板中,应该已经能看到新的计算机名,显示 ADS01

为确认新的计算机名称已被正常应用,我们还可以打开 DNS 管理器进行确认。

例如,我在正向查找区域 mikumoe.com 中,可以看到新的 FQDN ADS01.mikumoe.com 已经被添加到 DNS 中。

但同时发现,旧的 FQDN WIN-BLAHBLAH.mikumoe.com 依然存在于 DNS 记录里,因此可以右键手动删除

包括在 mikumoe.com/_sites/Default-First-Site-Name/_tcp 目录中的相关 SRV 记录,也更新为了 ADS01.mikumoe.com

最后,还可以使用以下命令验证 FSMO 信息:

1
netdom query fsmo

例如:

1
2
3
4
5
6
7
PS C:\Windows\system32> netdom query fsmo
架构主机 ADS01.mikumoe.com
域命名主机 ADS01.mikumoe.com
PDC ADS01.mikumoe.com
RID 池管理器 ADS01.mikumoe.com
结构主机 ADS01.mikumoe.com
命令成功完成。

Wow, nice!

参考连接

[1] Microsoft Docs, Rename a Domain Controller Using Netdom

关于 BFC

根据 Mozilla 的 MDN 文档1中关于 BFC(Box Formatting Content,块级格式化上下文)的说明:

A block formatting context is a part of a visual CSS rendering of a web page. It’s the region in which the layout of block boxes occurs and in which floats interact with other elements.

Formatting contexts affect layout, but typically, we create a new block formatting context for the positioning and clearing floats rather than changing the layout, because an element that establishes a new block formatting context will:

  • contain internal floats.
  • exclude external floats.
  • suppress margin collapsing.

讲简单点,BFC 是页面上的一个独立容器,内部的元素不会影响外部的元素,反之亦然。

而盒子是否形成 BFC,对元素的 CSS 浮动有重要影响。同时,BFC 还能取消 margin 塌陷(margin collapsing),以及阻止元素被 float 的元素覆盖。

举个栗子

一个没有形成 BFC 的例子:

1
2
3
4
5
6
<div>	<!-- 没有设置 height -->
<p></p>
<p></p>
</div>

<!-- p 标签设置了 height 和 float -->

如果一个父元素(例子中的 div 标签)不设置 height,而内部的子元素都为 float 时,就无法撑起自身:

noBFC

创建 BFC

创建 BFC 的方法有很多,从文档的根元素 <html> 标签,到设置 column-span: all; ,具体可参考 Mozilla 的 MDN 文档1中的详细描述。

但是,针对上述例子中的场景,创建 BFC 有 4 种典型的方法:

  1. 父元素 添加属性 overflow: hidden; (推荐)
  2. 父元素 position 属性的值不是 staticrelative (推荐)
  3. 父元素 float 属性的值不是 none
  4. 父元素 display 的值是 inline-block, flexinline-flex

效果如下:

BFC

清除浮动

浮动一定要封闭到一个盒子中,否则会对页面其他元素产生影响。

举个栗子

一个没有清除浮动的例子:

1
2
3
4
5
6
7
8
9
10
<div>
<p></p>
<p></p>
</div>
<div>
<p></p>
<p></p>
</div>

<!-- p 标签设置了 float -->

原因就在于 div 没有形成 BFC,导致子元素无法形成两行:

noClear

清除浮动的方法

如果父元素的高度固定,那么直接设置 height 属性即可。

但是,父元素高度如果不固定(如,元素内容是动态的),那么就不能设置固定的 height 值。此时,也有几个典型的方法:

1. 父元素形成 BFC

让父元素形成 BFC,如:设置 overflow: hidden;

2. 设置 clear:both; 属性

后面的父元素设置 clear:both;clear 属性用来清除浮动对自己的影响,both 参数表示左右浮动都清除。

但由于前面的父元素依旧没有 height,可能会在后续元素定位上产生些问题。

3. 使用 ::after 伪元素(推荐)

使用 ::after 伪元素,给父元素最后添加一个子元素,并且给 ::after 设置 clear:both

1
2
3
4
5
.clearfix::after {
content: '';
clear: both;
display: block; /* 别忘记设置 */
}

效果如下:

Clear

参考资料

[1] MDN contributors, Block formatting context

对图进行遍历时,我们往往会建立一个数组 vis[],用来记录是否访问过某一结点,或(在广度优先遍历时)建立一个数组 inq[] ,用来记录结点是否进入过队列。

但如果需要获得遍历过程中,从起始结点到各个结点的路径,可以通过记录结点的前驱来实现。

PHP 关联数组

在 PHP 的实现中,可以直接将数组 vis[] (或是 inq[]) 换作一个关联数组,用来记录结点前驱。其中,下一个结点 $next 作为关联数组的键,$node 当前结点为值:

1
2
3
4
$inq[ $next ] = $node;
// $inq 关联数组
// $next 下一个结点
// $node 当前结点,即作为下一个结点的前驱

遍历过程中,如果要确认某个结点是否被访问过(或是否进入过队列),可使用 array_key_exists(key, array) 函数,检查某一个数组中是否存在某一个键名。例如,若能在 $inq 中找到名为 $next 的键(即返回 true),那就说明 $next 已经进入过队列:

1
2
3
array_key_exists($next, $inq);
// $next 下一个结点,即关联数组的键
// $inq 关联数组

获得路径

建立一个数组 $path,用来保存结点路径, $i 为数组 $path 下标。

如果需要获得从起始结点 $start 到某一结点 $node 的路径,可以通过循环,不断寻找当前结点的前驱,同时记录到数组 $path 中:

1
2
3
4
5
6
$i = 0;
while( $node != $start ){ // 如果没有到达起始结点
$path[ $i ] = $node; // 记录到路径数组中
$node = $inq[ $node ]; // 变成前驱
$i++; // 下标 +1
}

此时数组 $path 中,起始结点在 $path 最后一位。如果需要正向序列,只要逆向输出即可!

在 C/C++ 中的实现

在 C++ 的 STL 容器中有一种 map,也应该可以实现。

map 可以将任何基本类型(包括 STL 容器),映射到任何基本类型(包括 STL 容器):

1
map<typename1, typename2> mp;

当然,在一些简单场景下,前驱的记录可以直接单纯地用一个一维的数值数组实现,类似于数组实现的静态链表。

错误的定义

起因是我在 main() 函数外定义了一个全局变量和数组:

1
2
int n = 10;
int array[n];

然后,编译器就不留情面地报错了:

[Error] array bound is not an integer constant before ‘]’ token

如果是 C,对数组进行类似错误的定义,会出现如下的报错:

[Error] variably modified ‘array’ at file scope

加上 const 限定符

一般而言,C/C++ 的编译器在编译时,一个数组的长度往往要求是静态已知的。因此,如果数组 array[n] 长度是借助一个变量 n 来确定,那么可以加上 const 限定符:

1
2
int const n = 10;	// 加上 const
int array[n];

或者换种方式:

1
2
#define size 10	// 宏定义
int array[size];

《C Primer Plus》中有阐述道,C90 新增的 const 关键字是 用于限定一个变量为只读。同时中文版的译者还在其中注解道:在 C 语言中,用 const 类型限定符声明的是变量,不是常量。1

变长数组(variable-length array, VLA)

在 C 的 C99 标准中,引入了变长数组的特性,即允许使用变量表示数组的维度:

1
2
int n = 10;
int array[n]; // 一个变长数组

但最终,C11 把变长数组变成了一个可选特性。其实,变长数组的“变”也不过是在创建数组时,可以使用变量指定数组的维度。至于想修改已创建的数组长度——tan90!(不存在的!)

变长数组相对而言是新特性,所以目前完全支持这一特性的编译器也不多。

遵守规范

有人在 StackOverflow2 上指出,如果把最上面对变量和数组的错误定义,放在 main() 函数里头,虽然没有报错(这也恰恰符合我的印象),但也是不合规范的:

Both examples are ill-formed in C++. If a compiler does not diagnose the latter, then it does not conform to the standard.

You use a language extension that allows runtime length automatic arrays. But does not allow runtime length static arrays. Global arrays have static storage.

参考资料

[1] Stephen Prata.C Primer Plus[M].北京:人民邮电出版社,2019:78.
[2] eerorika, Why should global array size be an integer constant?

又入手了一台 Surface Pro。然而 DPST(Display Power Saving Technology,显示器节能技术)对我而言,必须得关!

早前有一篇日志已经讨论过 Surface Pro 4 和 The New Surface Pro(5th Gen)关闭 DPST 的方法1。Surface Pro 7 的操作方法也类似,只不过项目在注册表中的位置和数值稍有变化。

Surface Pro 7 注册表中关于 DPST 的设置位于

1
[HKEY_LOCAL_MACHINE\SYSTEM\ControlSet001\Control\Class\{4d36e968-e325-11ce-bfc1-08002be10318}\0000]

定位到 FeatureTestControl 项,其默认值为 200

之前的日志里有提到:

FeatureTestControl 的字段中,每个值都代表了一个功能特性。其中 0 表示启用某个特性,而 1 则表示禁用。Intel 的显卡驱动正是通过读取该注册表项中的值来决定是否启用相关特性。而 DPST 的值,就在从右往左数第五位。

十六进制 200 的转换成二进制为 0010 0000 0000,把从右往左数的第五位改成 1,即关闭 DPST,那么值为 0010 0001 0000,换算回十六进制为 210

只要把 FeatureTestControl 的值改成 210 即可关闭 DPST。

修改完毕后,重启系统。

参考链接

[1] 新 Surface Pro 的 DPST 设置

环境配置

我习惯使用 Anaconda,这应该是配置开发环境最简单且最方便的方法之一了。环境可以在 Environments 里直接新建一个,接着安装相应的包,安装过程中,请留意选择 GPU 的版本,例如:

  • tensorflow-gpu
  • keras-gpu

设备检测

安装完成后进入环境,尝试打印出设备看看,检查环境是否顺利配置:

1
2
gpus = tf.config.experimental.list_physical_devices('GPU')
print(gpus)

如果顺利,应该会打印类似如下的信息:

[PhysicalDevice(name='/physical_device:GPU:0', device_type='GPU')]

可以看到,Tensorflow 已经能检测到 GPU 了,比如我就只有一块。

开启训练

我随便找了个 CNN 的网络,打算做个简单的测试。但在开启模型训练之后,程序就突然报错:

UnknownError:   Failed to get convolution algorithm. This is probably because cuDNN failed to initialize, so try looking to see if a warning log message was printed above.     [[node sequential/conv2d/Conv2D (defined at C:\path_of_envs\lib\site-packages\tensorflow_core\python\framework\ops.py:1751) ]] [Op:__inference_distributed_function_985]Function call stack:distributed_function

在这过程中,可以通过任务管理器留意到,当程序执行到定义网络结构的部分时,显存会突然开始飙升,直至几乎吃满。怀疑是不是显存炸了所以无法进行训练,毕竟已经有数据顺利跑了一部分了。

plot-regression

根据 Tensorflow 的官方文档1,它是这样描述的:

By default, TensorFlow maps nearly all of the GPU memory of all GPUs (subject to CUDA_VISIBLE_DEVICES) visible to the process. This is done to more efficiently use the relatively precious GPU memory resources on the devices by reducing memory fragmentation.
……
In some cases it is desirable for the process to only allocate a subset of the available memory, or to only grow the memory usage as is needed by the process. TensorFlow provides two methods to control this.

The first option is to turn on memory growth by calling tf.config.experimental.set_memory_growth, which attempts to allocate only as much GPU memory as needed for the runtime allocations
……

也就是说,默认情况下,Tensorflow 会把所有显卡的显存都吃掉,减少碎片从而提高效率。显然我的鸡踢叉 1080 根本经不起这样折腾,所以得靠 tf.config.experimental.set_memory_growth 进行按需分配:

1
2
3
4
5
6
gpus = tf.config.experimental.list_physical_devices('GPU')
try:
for gpu in gpus:
tf.config.experimental.set_memory_growth(gpu, True)
except RuntimeError as ex:
print(ex)

可以把上面这段代码放在 import 部分的下面。如果你对显存大小的分配有更严格的要求,可以使用:

1
2
3
4
5
tf.config.experimental.set_virtual_device_configuration(
# 例如指明第一块显卡
gpus[0],
# 设置分配的显存大小
[tf.config.experimental.VirtualDeviceConfiguration(memory_limit=1024)])

配置完成后,尝试运行~

[============================================================================================================>哇~~~~~~速度简直了!

参考链接

[1] Google, TensorFlow API: Use a GPU.